
That high-end luxury vinyl tile you just installed isn’t as indestructible as the marketing brochures might suggest. While it’s built for durability, using the wrong cleaner is the fastest way to turn a premium finish into a dull, scratched surface. At Frankly Flooring, we’ve spent 20 years helping homeowners select the best materials; we’ve seen exactly what happens when good floors meet bad habits. Understanding how to clean lvt flooring doesn’t have to be a guessing game involving harsh chemicals or expensive equipment. It’s about using the right techniques to protect the wear layer and maintain that showroom shine for decades.
We know the fear of seeing that first deep scratch or dealing with a cloudy, streak-filled finish after a long afternoon of mopping. It’s frustrating when you’re trying to do the right thing but feel unsure about which chemicals are safe for your home. This guide provides a straight-talking approach to maintenance, promising a simple, repeatable routine that delivers a streak-free finish every time. We’ll walk you through the essential tools like pH-neutral cleaners and felt pads, the “never-use” list of household products, and the specific steps to tackle stubborn scuffs without compromising your floor’s integrity.
Key Takeaways
- Understand the ‘Grit Factor’ and why daily dry-mopping is the most important step in how to clean lvt flooring without causing micro-scratches.
- Avoid the common mistake of using steam mops; we explain how heat and pressure can force moisture into the joints and ruin your investment.
- Stop damage before it starts by using high-quality accessories like felt pads and barrier mats to catch debris at the door.
- Learn the golden rule for tackling stubborn stains and spills to ensure pigments don’t migrate into the tile’s protective wear layer.
- Establish a simple, chemical-safe routine that delivers a professional, streak-free finish every time you clean.
The Fundamentals: What Makes LVT Cleaning Different?
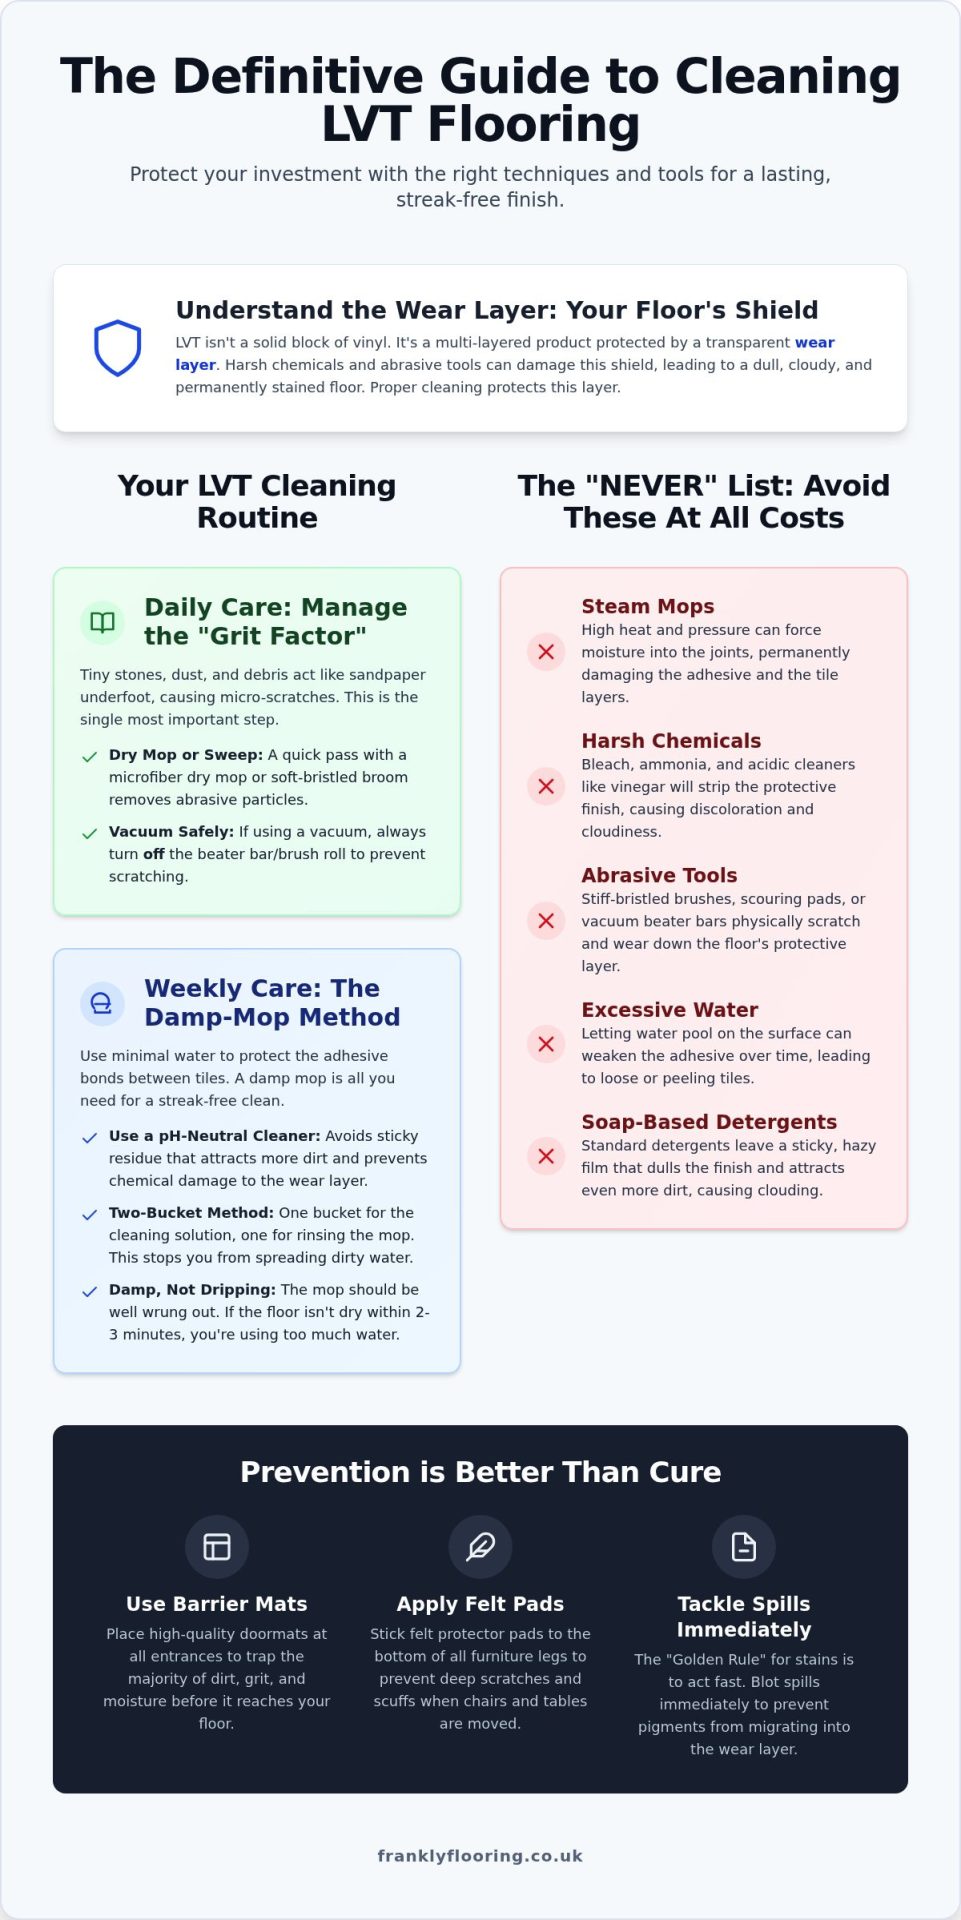
Luxury Vinyl Tile is often marketed as the ultimate “fit and forget” flooring. While it’s true that LVT is incredibly tough, it isn’t indestructible. To understand how to clean lvt flooring properly, you first need to understand what you’re actually cleaning. It isn’t a solid block of vinyl; it’s a sophisticated, multi-layered product. At the base, you have stability layers, followed by the high-definition design layer, and finally, the transparent wear layer that takes the brunt of daily life.
Many people assume that because LVT is waterproof, they can treat it like a wet room floor. That’s a mistake. While the tiles themselves won’t swell or warp, the adhesives used to bond them to your subfloor are often only water-resistant. Excessive water can seep into joints, weakening the bond over time. At Frankly Flooring, we’ve spent 20 years seeing exactly how maintenance affects longevity. We believe in being direct: your cleaning routine determines if your 20-year floor actually lasts 20 years.
Understanding the LVT Wear Layer
The wear layer is the unsung hero of your home. It’s a clear coating designed to protect the photographic design underneath from foot traffic and UV fading. However, it has its limits. If you use abrasive cleaners or stiff brushes, you’re essentially sanding down that protection. Once the wear layer is compromised, the floor loses its sheen and becomes susceptible to permanent staining. The wear layer is the primary barrier against moisture and stains. If you treat it with respect, it stays clear; if you abuse it with harsh chemicals, it turns cloudy and dull.
The Problem with Traditional Cleaning Methods
The old-fashioned method of slopping a soaking wet mop across the room is outdated. For modern LVT, this approach causes more harm than good. Standard supermarket detergents often have a high pH level, which can strip the factory finish or leave a sticky residue that actually attracts more dirt. This buildup is the primary cause of “clouding” that many homeowners notice after a few months. Using a pH-neutral cleaner is non-negotiable for several reasons:
- Chemical Integrity: It protects the chemical bond of the wear layer.
- Residue Prevention: It eliminates the sticky film caused by soap-based cleaners.
- Finish Maintenance: It preserves the original matte or gloss levels of your tiles.
The “Grit Factor” is another silent killer. Tiny stones, dust, and outdoor debris act like sandpaper underfoot. Every step you take on a dirty floor grinds those particles into the surface. Learning how to clean lvt flooring effectively starts with removing this dry grit before a drop of water ever touches the tiles. Without this first step, you’re just moving abrasive particles around, creating micro-scratches that eventually ruin the floor’s character.
Your Daily and Weekly LVT Cleaning Routine
Consistency is the secret to a floor that looks as good in year ten as it did on day one. When considering how to clean lvt flooring, you should view it as a two-stage process: daily debris removal and weekly damp maintenance. Daily care is about managing the grit we mentioned earlier. A quick pass with a soft-bristled broom or a dry microfiber mop prevents tiny stones from being ground into the surface by foot traffic. It takes five minutes but saves years of wear.
Weekly cleaning requires a bit more precision. We recommend the “Two-Bucket” method to maintain total clarity. One bucket contains your diluted pH-neutral cleaner, while the other is filled with plain water for rinsing your mop. This ensures you aren’t just moving dirty water around your home. Your mop should be damp, never dripping. If the floor doesn’t air-dry within two or three minutes, you’re using too much water. Excessive moisture sitting on the surface is the enemy of the adhesives holding your tiles in place.
The Right Tools for the Job
The equipment you use matters just as much as the technique. Avoid stiff outdoor brushes; their bristles are too aggressive for the wear layer. If you prefer vacuuming, it’s vital to turn off the beater bar or brush head. These rotating brushes are designed for carpets and can leave fine, circular scratches on vinyl. A microfiber mop is the Frank recommendation for a streak-free finish because the tiny fibres trap dirt rather than pushing it into the joints between tiles.
Choosing a Safe Cleaning Solution
Don’t reach for the bleach or ammonia. These harsh chemicals can permanently discolour your tiles. even vinegar, a common “natural” choice, is often too acidic and can eat away at the protective finish over time. Stick to a dedicated pH-neutral solution. It’s safer for the floor and your family.
Be wary of “mop and shine” products found in supermarkets. These often contain waxes or silicones that create a temporary glow but lead to a nasty, sticky build-up that’s difficult to remove. When using concentrates, always follow the dilution instructions to the letter. Too much soap leaves a film that makes the floor look cloudy. For the best results, pair your routine with high-quality flooring accessories designed specifically for luxury vinyl tiles. This simple approach ensures your floor remains a foundational element of your home’s character without the need for high-pressure maintenance.
Removing Tough Stains and Scuffs from Luxury Vinyl
Spills happen. Whether it’s a glass of red wine during a dinner party or a dropped crayon in the playroom, the key is how you respond. The golden rule for how to clean lvt flooring when a mess occurs is speed. You must act fast to prevent pigments from migrating into the wear layer. Once a stain sets, it becomes much harder to lift without aggressive scrubbing that might damage the protective finish.
Most common household spills like fruit juice, wine, or grease are easy to manage if caught early. For non-liquid marks like ink or permanent marker, you’ll need a bit more patience. While LVT is incredibly resilient, some chemicals in markers can react with the top coating if left for too long. We’ve spent 20 years advising customers on the best way to handle these mishaps, and the Frank secret for rubber scuff marks is surprisingly simple: a clean tennis ball. It sounds odd, but the texture of the ball lifts the rubber from the floor without any need for harsh chemicals.
A Step-by-Step Guide for Stubborn Spots
When you’re faced with a mark that won’t budge during your weekly routine, follow this process to ensure you’re learning how to clean lvt flooring safely:
- Step 1: Blot the area immediately. Never rub a liquid spill, as this just pushes the pigment deeper into the textured surface or spreads it across more tiles.
- Step 2: Apply a single, concentrated drop of your pH-neutral LVT cleaner directly to a soft, clean cloth. Gently work the cloth over the spot in a circular motion.
- Step 3: For dried-on grime that has hardened, use a soft nylon brush. Avoid scouring pads or steel wool at all costs; they will leave permanent dull patches on your floor.
Dealing with Scuffs and Scratches
Rubber scuff marks from trainers or furniture feet are common but easily fixed. If the tennis ball trick doesn’t work, a soft white pencil eraser can often lift the mark right off. Just ensure the eraser is clean so you don’t introduce new dirt to the area. This low-impact approach preserves the floor’s character without the need for abrasive scrubbing.
Deeper gouges or scratches require a different approach. While small surface scratches can sometimes be masked with a specialized LVT repair kit, a deep cut that penetrates the design layer is usually permanent. This is where the modular nature of the product becomes a major benefit. To understand why individual tile replacement is possible, read our guide on What Is LVT Flooring? A Frank Guide. Being able to swap out a single damaged tile is far more cost-effective than replacing an entire carpet or sanding down a whole wooden floor. It’s one of the many reasons we believe LVT is the most practical choice for a busy home.
The “Never” List: Why You Should Avoid Steam Mops
There is a massive misconception that because luxury vinyl is waterproof, it can handle any level of moisture or heat. This is the single most common mistake homeowners make when learning how to clean lvt flooring. Steam mops are marketed as the ultimate hygienic tool, but they are the natural enemy of vinyl tiles. While the surface of your floor is designed to repel a spilled drink, it isn’t built to withstand pressurized vapor. It’s a costly error that can ruin a beautiful room in minutes.
The problem lies in the physics of steam. Pressurized steam doesn’t just sit on the surface; it forces moisture deep into the expansion gaps and joints between your tiles. Once water gets underneath the vinyl, it has nowhere to go. This trapped moisture attacks the adhesive bond that holds your floor to the subfloor. Heat softens the glue, causing tiles to shift, lift, or slide out of place. Frankly speaking, using a steam mop usually voids your manufacturer warranty instantly. Most brands can detect heat damage during an inspection, leaving you with no recourse if the floor fails.
The Danger of Delamination
Delamination is a technical term for a very simple, ugly problem. It occurs when the clear wear layer separates from the decorative design layer underneath. This happens because the intense heat causes the different materials in the tile to expand at different rates. You might notice “peaking” or “warping” at the edges of your tiles where they start to curl upwards. LVT is designed for ambient temperatures, not the 100°C+ of steam. Once this structural damage occurs, there is no way to “stick” it back down; the tile is permanently compromised.
Banned Chemicals and Materials
Beyond heat, certain chemicals can do just as much damage to your floor’s integrity. Bleach and ammonia-based products are particularly dangerous. These harsh substances can cause a chemical reaction that turns the vinyl yellow or makes the wear layer brittle and prone to cracking. We also advise against using floor wax or furniture polish. These products create a dangerous slip hazard and leave a dulling film that is incredibly difficult to strip away without damaging the floor.
When you are deciding how to clean lvt flooring, stay away from abrasive tools. Steel wool and green scouring pads create thousands of micro-scratches on the surface. These scratches might be invisible at first, but they act as traps for dirt and grime, making your floor look permanently “grubby” no matter how much you mop. To keep your floor in peak condition without the risks, stick to our recommended safe cleaning accessories and pH-neutral solutions. It’s the only way to ensure your floor remains a foundational element of your home’s character for the long term.
Frankly, Prevention is Better Than Cure
The most effective way to manage how to clean lvt flooring is to stop the mess from entering your home in the first place. Think of your floor as an investment that requires a “barrier system” to survive the rigours of UK weather. Industry professionals suggest that a proper matting system can catch up to 80% of the grit and moisture that would otherwise be ground into your tiles. We recommend a dual-mat approach: a heavy-duty scraper mat outside to remove large debris and a secondary absorbent mat inside to soak up water.
Sunlight is another silent factor that many people overlook. While luxury vinyl is highly resistant to UV, several years of direct, intense sunlight can cause subtle fading in specific patches. It’s a slow process, but using blinds or curtains during the brightest parts of the day keeps your floor’s colour consistent across the entire room. Pet owners also need to be mindful of high-traffic areas. Keeping claws trimmed is a simple way to prevent deep gouges that no cleaning routine can fix. If you’re wondering how to clean lvt flooring after a muddy walk, remember that a dry sweep to remove dried mud is always better than immediate wet mopping.
The Doormat Dilemma: Choosing the Right Backing
Not all doormats are created equal. In fact, the wrong mat can do more damage than no mat at all. Many cheap supermarket mats use rubber backings that contain chemicals which react with the vinyl. This process, known as “plasticizer migration,” causes permanent yellow staining that cannot be cleaned off. We always advise our customers to choose mats with natural fibre or non-staining PVC backings. For a broader look at how different materials hold up under pressure, check out our Laminate Flooring UK: The Frank 2026 Buying Guide. It offers a useful comparison on durability and maintenance requirements across various flooring types.
Moving Furniture Without the Heartache
Rearranging a room shouldn’t mean ruining your floor. The “Lift, Don’t Slide” rule is non-negotiable for heavy items like sofas, dressers, or dining tables. Sliding a heavy piece of furniture can create deep pressure marks or even tear the wear layer. If you’re working alone, use plywood sheets or professional “gliders” to distribute the weight. Felt pads are the most important accessories you can buy for your home. They create a soft buffer between furniture legs and the floor; however, they aren’t a one-time fix. We recommend checking and replacing these pads every six months. As they wear down, they can trap grit and become abrasive themselves, turning a protective tool into a source of scratches. It’s a small detail, but it’s these technical nuances that ensure your floor remains a foundational element of your home’s character.
Maintaining Your Floor’s Character for the Long Haul
Keeping your luxury vinyl tiles in peak condition doesn’t require a cupboard full of expensive chemicals or a complicated schedule. It comes down to a few simple, disciplined habits. By prioritizing daily grit removal with a soft broom and strictly avoiding the structural damage caused by steam mops, you protect the wear layer that keeps your home looking premium. Remember that prevention, like using non-staining mats and checking your furniture’s felt pads every six months, is just as important as the mopping itself.
Understanding how to clean lvt flooring is about more than just hygiene; it’s about preserving a foundational element of your home. At Frankly Flooring, we believe in giving you the straight-talking, expert advice you need to make your investment last. As a family-run business with 20 years of experience, we pride ourselves on providing the right materials and honest guidance to homeowners across the country. Whether you need a new floor or the right tools to maintain one, we offer national UK delivery to get you started.
Browse our range of high-quality LVT and accessories at Frankly Flooring to find everything you need for a beautiful, durable home. Your floors are the backdrop to your life; let’s make sure they stay looking brand new.
Frequently Asked Questions
Can I use a steam mop on LVT flooring?
No. Steam mops use intense heat and pressure that can force moisture into the joints between tiles and soften the adhesive bond to your subfloor. This often leads to delamination or warping, where the edges of the tiles start to curl upwards. Most manufacturers will void your warranty if they find evidence of steam cleaning. Stick to a damp microfiber mop and a pH-neutral solution to keep your floor safe and structurally sound.
How often should I clean my luxury vinyl tiles?
You should dry-sweep or dust-mop your floor every day to remove abrasive debris. For deeper maintenance, a damp mop once a week is usually enough for the average UK home. If you have a busy household with pets or children, you might need to mop more often. Consistent daily removal of grit is the most effective way to prevent the fine scratches that eventually make a floor look tired and dull.
Is it okay to use vinegar and water to clean LVT?
We don’t recommend using vinegar as a permanent cleaning solution. While it’s a common household tip, the acidity in vinegar can slowly degrade the protective wear layer over time. This leads to a loss of shine and makes the floor more susceptible to stains. For the best results when learning how to clean lvt flooring, use a dedicated pH-neutral cleaner. It’s designed to lift grime safely without causing chemical damage to the vinyl’s finish.
What is the best cleaner for LVT floors in the UK?
The best choice is a professional pH-neutral cleaner specifically formulated for luxury vinyl. Avoid generic supermarket products that contain bleach, ammonia, or oils, as these can leave a sticky film or cause the vinyl to turn brittle. High-quality concentrates offer the best value and performance. They provide a streak-free finish and ensure the clear wear layer remains transparent. This allows the high-definition design of your tiles to stay sharp and vibrant for years.
Can you use a vacuum on LVT flooring?
Yes, vacuuming is safe as long as you turn off the beater bar or rotating brush head. Those stiff brushes are meant for lifting dirt from carpet fibres and can easily scratch a vinyl surface. Use the hard floor setting or a dedicated suction attachment with soft bristles. Vacuuming is actually a great way to remove dry grit from the textured surface of your tiles, which is the first step in any effective cleaning routine.
How do I remove scuff marks from my vinyl tiles?
Most rubber scuff marks can be removed with a clean tennis ball or a soft pencil eraser. If the mark is stubborn, use a soft cloth with a small amount of concentrated pH-neutral cleaner. Gently rub the area until the scuff lifts. You must avoid using green scouring pads or steel wool. These abrasive materials will leave permanent dull patches on your floor that trap dirt and are impossible to fix without replacing the tile.
Why is my LVT floor looking dull after cleaning?
A dull appearance is usually the result of a soapy film left behind by improper dilution or “mop and shine” products. If you use too much cleaner, it creates a sticky residue that traps dust and makes the floor look cloudy. To restore the shine, mop the floor with plain, warm water to remove the buildup. In the future, follow the instructions for how to clean lvt flooring carefully, ensuring you use the correct ratio of cleaner.
Do I need to polish or wax my LVT floor?
No. LVT comes with a factory-finished wear layer that is designed to stay clear and durable without any extra coatings. Applying wax or polish will only create a slippery surface and a thick build-up that eventually turns yellow or peels. If your floor looks dull, it’s likely due to residue from cleaning products rather than a lack of polish. A thorough rinse with warm water is usually all that’s needed to bring back the original finish.