
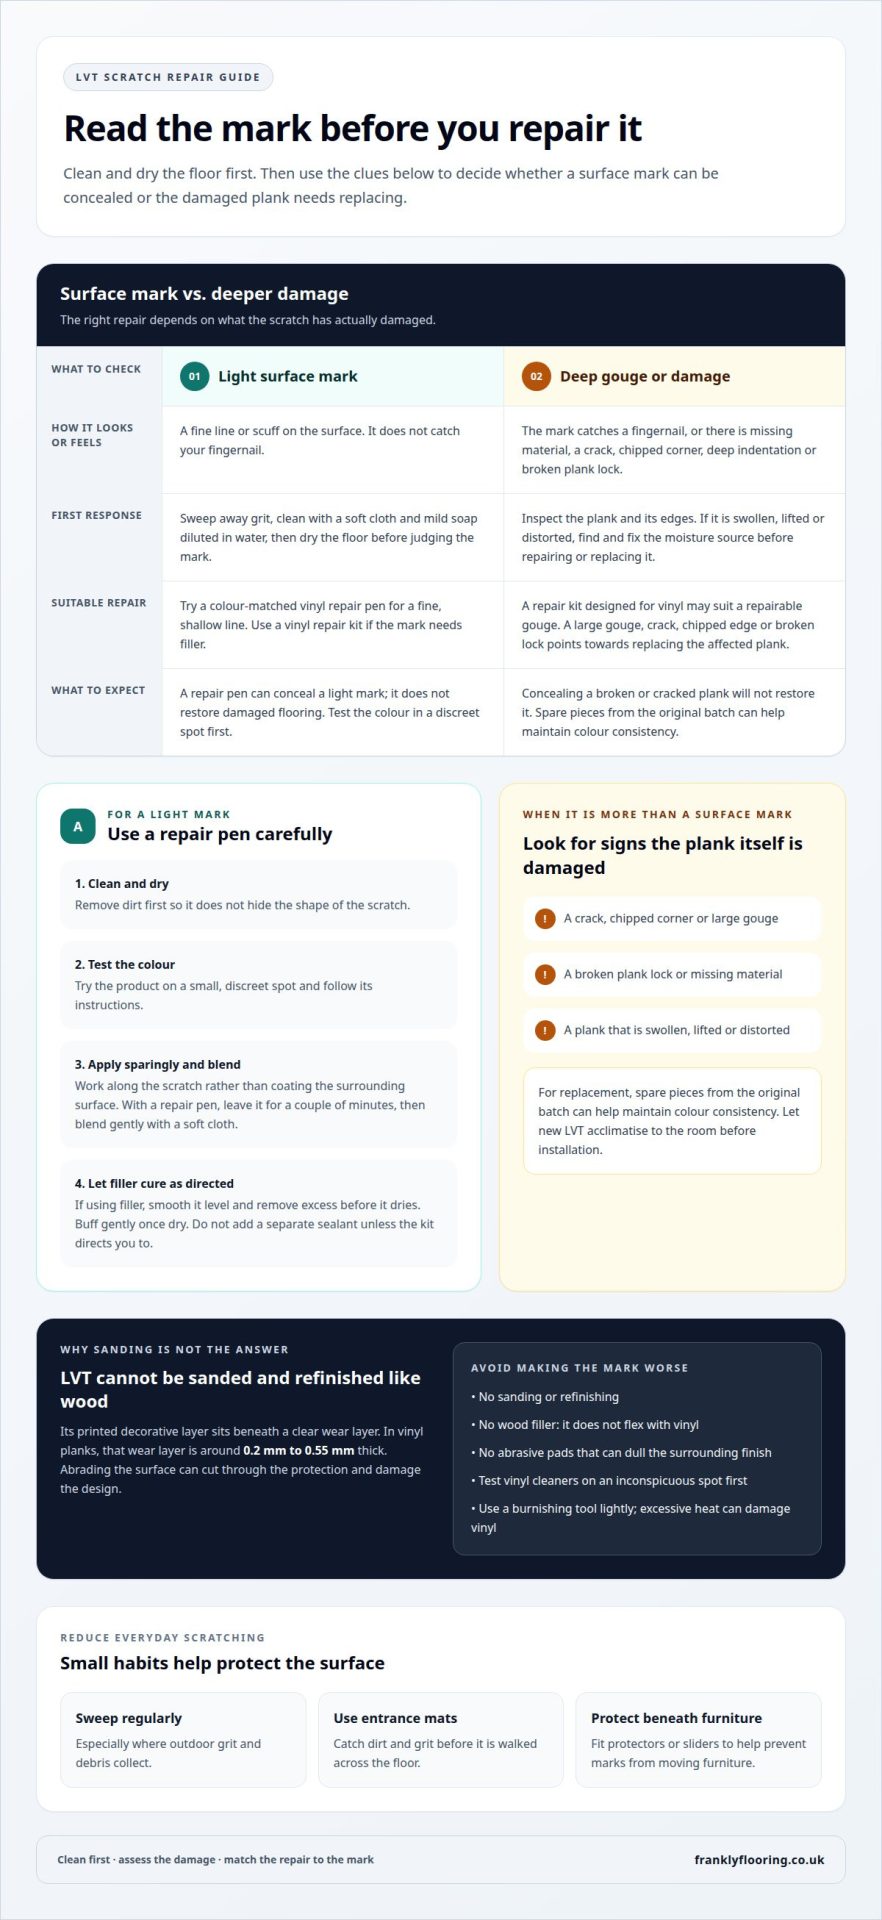
LVT can scratch, but a light surface mark can often be concealed with a repair pen; deeper gouges may need filler or a replacement plank. Unlike wood, LVT cannot be sanded and refinished because its decorative layer sits beneath a clear wear layer. Knowing how to fix scratches in LVT starts with judging whether the mark is superficial or has damaged the plank.
It’s understandable to want to remove a scratch completely, especially when it catches the light. But the wrong method can make the damage more noticeable. Clean the floor first, then choose a repair that suits the mark.
This guide explains how easily LVT can scratch, which scratch-removal methods to avoid, and how to use a repair pen to conceal light marks. You’ll also learn when a deep gouge is better addressed by replacing the affected plank rather than trying to disguise it.
Key Takeaways
- Learn to distinguish a surface mark from damage that may affect the plank’s edge or structure.
- Avoid repair methods that can harm LVT or fail to flex with the flooring.
- Use a repair pen carefully to blend a light mark, testing the product on a small area first.
- Recognise when a gouge or crack calls for plank replacement, and explore LVT flooring from Frankly Flooring when considering your flooring options.
How easy is it to scratch vinyl flooring?
LVT is scratch resistant, but grit, sharp objects and dragged furniture can still mark it. Its printed design sits beneath a clear wear layer, around 0.2 mm to 0.55 mm thick in vinyl planks, so sanding cannot restore it like wood. Prevent scratches with regular sweeping, entrance mats and furniture protectors. Warranty coverage depends on the manufacturer’s written terms; follow its care and repair instructions, since damage caused by an unsuitable repair may not be covered.
- Clean the damaged area first. Sweep away grit, then clean the mark so dirt doesn’t hide its shape. Dry the floor before judging the damage. A fine line may be surface-level, while a mark that catches a fingernail is deeper and needs a different approach.
- Check for a gouge or edge damage. Look for missing material, a crack, a chipped corner or a broken plank lock. These signs mean the damage is more than a light scratch. A large gouge or broken edge is a reason to replace the affected plank rather than simply conceal the mark.
- Identify moisture before repairing it. If a plank is swollen, lifted or distorted, find and fix the moisture source first. Repairing the visible damage without addressing the water can leave the underlying cause in place and damage the replacement material.
- Replace a damaged plank or tile when needed. A cracked or chipped piece may need to be replaced rather than repaired in place. Spare pieces from the original batch can help maintain colour consistency. New LVT should acclimatise to the room before installation to help prevent warping.
- Protect the floor during daily use. Place mats at entrances to catch dirt and grit, and fit protectors or sliders beneath furniture. Sweep regularly, especially where outdoor debris collects, because small particles can scratch underfoot or beneath moving furniture.
What should you avoid when trying to remove scratches from LVT flooring?
- Don’t sand or refinish the surface. LVT has a printed decorative layer beneath a clear wear layer, unlike timber that can be sanded back. Abrading it can cut through the protective surface and damage the design, making a fine scratch harder to disguise. For vinyl flooring, use a repair method suited to its surface instead.
- Keep wood filler away from vinyl planks. Wood filler doesn’t flex with vinyl, so it can loosen and pop out over time. It may also leave a visible patch that doesn’t match the plank. For a gouge, use a filler designed for LVT and follow its product instructions.
- Don’t attack a superficial scuff with abrasive pads. A rough sponge or scouring pad can dull the finish around the mark, creating a larger, cloudy patch. First clean the area with a soft cloth and mild soap diluted in water. If the mark remains, assess it before choosing a repair product.
- Avoid aggressive stain removers and untested cleaners. Strong solvents or an unsuitable cleaner may affect the printed pattern or finish. For persistent stains, test a vinyl floor cleaner on an inconspicuous spot first. Follow its label, use a soft cloth, and remove residue as directed.
- Don’t use a burnishing tool carelessly. Minor scratches may be smoothed with a burnishing tool, but excessive heat can damage vinyl. Keep the tool moving, apply light pressure and stop if the surface warms noticeably. Never try to erase a scratch by repeatedly working the same spot.
- Match the method to the mark. Cleaning may lift dirt that looks like a scratch, while a repair pen can conceal a light surface line. Neither approach restores a cracked plank. For flooring choices and vinyl options, browse vinyl flooring options.
Repair pens and scratch concealers for light marks
For a light surface mark, use a colour-matched vinyl repair pen or scratch repair filler, a soft cloth and the kit’s applicator. Clean and dry the area first, then test the product on a small, discreet spot and follow its instructions.
-
Gather Repair Tools and Materials
Choose a repair pen for a fine, shallow line, or a vinyl tile repair kit if the mark needs filler. Have a soft cloth and mild soap and water ready for cleaning, along with the kit’s applicator if supplied. Check the instructions for compatible flooring and preparation. Don’t use a pen to disguise a crack, chipped edge or deep gouge; those marks may need plank replacement.
-
Apply Colour-Matched Repair Filler
Apply the colour-matched product sparingly, working along the scratch rather than coating the surrounding surface. With a repair pen, colour the light mark, leave it for a couple of minutes, then blend gently with a soft cloth. For filler, apply a small amount, smooth it level and remove excess before it dries. Test the colour first, as a mismatch can make the repair more noticeable.
-
Cure, Texture, and Seal the Repair
Let filler dry for the time stated in its instructions before buffing; products can cure at different rates. Once dry, buff gently and check the result from different angles. Don’t add a separate sealant unless the kit directs you to, as an incompatible coating can change the finish. Repair pens can conceal light marks in a few minutes, but they won’t restore a broken plank.
How do you fix deep scratches or gouges in LVT?
A deep mark can sometimes be filled, but a cracked plank, large gouge or broken locking edge usually needs replacement. Use these steps to choose a repair that suits the damage.
- Assess the damage before applying filler. Clean the area and inspect the scratch from different angles. If it catches a fingernail, treat it as a deep scratch or scuff, not a light surface mark. A large gouge, crack, broken lock or deep indentation points towards replacing the affected plank rather than disguising it.
- Use a repair kit only for a repairable gouge. Choose a scratch repair kit designed for vinyl, and match its filler colour as closely as possible to the floor. Apply the filler according to the product instructions, then smooth it carefully. Wood filler isn’t suitable because it doesn’t flex with vinyl and can pop out over time.
- Allow the filler to cure fully. Vinyl filler may take 2 to 12 hours to cure, depending on the product. Keep the area clear for the time specified on its instructions. After curing, smooth or buff the repair as directed, taking care not to disturb the surrounding wear layer.
- Replace a plank with structural damage. A cracked or chipped plank, large gouge or broken lock is better replaced than covered. The damaged piece must be removed, and a replacement cut to fit and installed with adhesive. Spare planks from the original batch can help the new piece blend in colour.
- Consider replacing only the affected tiles. If several areas are badly damaged, replacing the affected tiles may be preferable to replacing the entire floor. Extensive damage needs careful assessment, particularly if moisture caused it. Identify and fix the moisture source before fitting replacement LVT, or the new material may also be affected.
Frankly Flooring
Frankly Flooring offers carpet and furniture for homeowners planning a wider room refresh after dealing with damaged flooring. If a deep gouge or cracked plank has prompted you to rethink the room, these options can help shape a new look alongside your flooring decisions. A light scratch that can be concealed may not call for a broader change, while extensive damage may make it worth considering how the whole space works together.
Choose repair when the damage is limited and the plank remains sound. If you’re weighing alternatives for the room, explore Frankly Flooring’s carpet and furniture ranges as part of your decision. For a straightforward conversation about the options, contact Frankly Flooring.
Choose flooring that suits the way you live
Planning ahead can make future floor care simpler. Consider how each room is used, where grit is likely to enter and which areas see frequent movement. These details can guide your flooring choice and help you plan practical protection, such as mats in busy entranceways.
Knowing how to fix scratches in LVT also helps you decide whether to repair a mark or change the room’s flooring. Frankly Flooring offers LVT, wood and carpet, so you can explore different materials and consider what best suits your home.
If you’re weighing up flooring options or want advice on the next step, contact Frankly Flooring for advice. A considered choice can help you feel more confident about the room ahead.
Frequently Asked Questions
Does LVT scratch easily?
LVT is scratch resistant, but it isn’t scratch-proof. Grit carried in on shoes may leave fine marks, while a sharp object or dragged furniture can cause deeper damage. After cleaning, check the mark in good light: if it catches a fingernail, treat it as a deeper scratch rather than a superficial line. This distinction helps you choose a suitable repair.
What causes scratches on LVT?
Grit and sand carried in on shoes or by pets can create fine surface marks underfoot. Dragging heavy furniture, dropping sharp objects and using an unsuitable vacuum cleaner can also scratch the wear layer. For example, a small stone trapped beneath a chair leg may mark the floor as the chair moves. Identifying how the scratch happened can help prevent similar damage.
When should you repair and when should you replace?
Conceal a light surface line if the plank remains intact and its edge and locking joint are undamaged. A deep gouge may need a vinyl-specific repair kit, while a crack, chipped edge or broken lock points to replacing the affected plank. If damage is limited to a few tiles, replacing those tiles may avoid changing the whole floor. Original spare planks can help with colour matching.
How do you repair light scratches in LVT flooring?
If you’re learning how to fix scratches in LVT, start by cleaning and drying the mark, then test a colour-matched repair pen in a discreet spot. Apply colour to the scratch, leave it for a couple of minutes and blend gently, following the product instructions. Start with a small amount, as an overly dark patch may be difficult to correct. Pens conceal light marks, not missing material.
Can scratches in LVT be removed with a repair kit, wax stick or filler?
A vinyl scratch repair kit or colour-matched filler can help conceal a gouge, while a repair pen suits a lighter mark. Use filler made for LVT, apply it as directed, then smooth and buff after it dries. Don’t assume a wax stick is suitable just because it matches the colour; use it only if its instructions specify compatibility with vinyl flooring.
What are the step-by-step instructions for repairing scratches in LVT?
To understand how to fix scratches in LVT, first clean and dry the spot so debris doesn’t obscure the damage. Decide whether it’s a light scratch, a gouge or structural damage. Test a vinyl repair product discreetly, then apply it according to its instructions. Blend a pen mark, or let filler cure before buffing. Replace a cracked plank or one with a broken locking edge rather than disguising it.