
Did you know that nearly 30% of warranty claims for luxury vinyl and SPC planks are actually caused by surface damage from improper maintenance? It’s a frustrating reality for many homeowners who realize too late that learning how to clean vinyl flooring properly is about more than just a quick mop; it’s about protecting a 20-year investment. You likely chose vinyl for its durability and style, but seeing a cloudy residue or stubborn scuff marks after an hour of hard work is incredibly discouraging.
We understand that you want a home that feels clean without the fear of accidentally scratching the surface or voiding your warranty with the wrong tools. This guide provides the honest, no-nonsense methods to keep your floors looking brand new without wasting money on useless chemicals or risky equipment. We will cover the specific pH-neutral solutions that actually work, the household items that are safe for your wear layer, and the simple steps to achieve a streak-free finish every time.
Key Takeaways
- Learn how to clean vinyl flooring using a moisture-minimal approach that ensures a streak-free finish without damaging the protective wear layer.
- Discover why steam mops and “mop and shine” products are the silent killers of LVT and how to avoid costly warranty-voiding mistakes.
- Get practical, honest solutions for removing stubborn rubber scuff marks and emergency spills before they lead to permanent stains.
- Understand the simple preventative measures, like choosing the right entrance mats, that can extend your floor’s lifespan to 20 years or more.
The Fundamentals of Vinyl Care: Protecting the Wear Layer
Most homeowners choose vinyl because it’s marketed as a “fit and forget” flooring. While it’s true that vinyl is incredibly durable, it isn’t invincible. To keep that showroom shine for 20 years, you have to understand what you’re actually cleaning. Your floor is a multi-layered product, and the most critical part is the wear layer. This is a clear, protective coating factory-applied to the top of the planks or sheets. It’s the only thing standing between your lifestyle and the printed design underneath. If you ruin this layer, the floor is effectively finished.
Frankly speaking, the biggest threat to your floor isn’t a spilled drink or a dropped plate. It’s the invisible grit you track in on your shoes. These tiny particles of sand and dirt act exactly like sandpaper. Every time you walk across the room, you’re grinding that grit into the surface. Over time, this creates thousands of microscopic scratches that trap dirt and make the floor look cloudy. Learning how to clean vinyl flooring starts with realizing that your goal isn’t just to remove visible stains, but to protect this delicate shield from abrasive damage.
The core of these floors is typically made from Polyvinyl chloride, which is a resilient material that handles moisture well. However, many people make the mistake of “stripping” the floor rather than cleaning it. They use harsh chemicals or abrasive pads that eat into the finish. Once that factory seal is compromised, the floor becomes porous, meaning it will soak up stains and look dull no matter how often you mop it. Protecting the wear layer is the secret to longevity.
Sheet Vinyl vs. LVT: Is There a Difference?
LVT and sheet vinyl share similar chemical foundations, but their construction changes how you approach maintenance. Luxury Vinyl Tile often features deep, realistic textures designed to mimic natural wood or stone. These textures look beautiful, but they are magnets for dirt and grime. You’ll need to be more thorough with your dry sweeping to get into those grooves. Sheet vinyl has the advantage of having almost no seams, making it much more water-resistant across the middle of the room. However, it’s usually thinner than LVT, so it’s more prone to tearing if you aren’t careful with heavy furniture.
Why “pH Neutral” Isn’t Just Industry Jargon
You’ll see the term “pH neutral” on every bottle of professional cleaner, and there’s a good reason for it. Many DIY solutions, like vinegar or lemon juice, are highly acidic. On the other end, many heavy-duty degreasers are highly alkaline. Both extremes can cause a chemical reaction that softens or discolours the wear layer over time. A pH-neutral cleaner is the gold standard for vinyl because it provides enough power to lift dirt without attacking the floor’s finish. When you master how to clean vinyl flooring, you’ll find that using the right chemistry is far more effective than using brute force or high heat.
Your Step-by-Step Routine for a Streak-Free Finish
A common mistake is thinking that more water equals a cleaner floor. With vinyl, the opposite is true. Excess water can find its way into the seams of your planks, potentially weakening the adhesive and causing edges to curl. A successful routine for how to clean vinyl flooring focuses on speed and minimal moisture. It’s about being efficient rather than aggressive.
Step 1: Dry Maintenance. Start by removing the loose grit we discussed in the previous section. Use a soft-bristled broom or a vacuum set to the hard floor mode. Ensure the beater bar is turned off. A rotating brush designed for carpet will leave permanent micro-scratches on your vinyl’s surface. It’s a small detail that saves years of wear.
Step 2: Spot Treatment. Before you bring out the mop, look for specific marks. Dried food or mud should be lifted with a damp cloth first. This prevents you from scrubbing the entire floor just to remove one stubborn spot. Taking thirty seconds to spot-clean prevents you from spreading that mess across the rest of the room.
Step 3: The Damp Mop. Use a microfibre mop rather than a traditional string mop. Microfibre holds less water and picks up more bacteria. For a detailed breakdown of chemical safety and professional techniques, Bob Vila’s guide to cleaning vinyl floors offers excellent advice on manufacturer-approved solutions that won’t damage your warranty.
Step 4: The Final Buff. This is the step most people skip. Once you’ve finished mopping, go over the floor with a dry microfibre cloth or a clean towel. This removes any remaining mineral deposits from the water that cause streaks as the floor air-dries. It’s the difference between a floor that looks “fine” and one that looks brand new.
The Two-Bucket Method: Why One Isn’t Enough
If you use a single bucket, you’re essentially washing your floor with increasingly grey, sandy water. The two-bucket system is a professional secret for a truly clean finish. Fill the first bucket with your pH-neutral cleaning solution. Fill the second with plain, warm water. Dip your mop in the cleaning solution, mop a section, then rinse the dirty mop in the plain water bucket before going back for more cleaner. It’s a simple change that keeps dirt off your floor and in the bucket where it belongs.
The Apple Cider Vinegar Recipe: A Frank DIY Hack
If you prefer a household solution over store-bought chemicals, cider vinegar is your best friend. Mix one cup of apple cider vinegar with a gallon of warm water. The mild acidity is perfect for breaking down dirt and grime without leaving a sticky, soapy film behind. We often recommend cider vinegar over standard white vinegar; the natural sugars in the cider version help restore a subtle, healthy glow to the surface. If your current floor is beyond a simple clean and you’re looking for a fresh start, you can browse our durable LVT collections for a replacement that’s built to last.
Dealing with Stubborn Stains, Scuffs, and Spills
Even if you follow a perfect maintenance routine, life happens. A dropped glass of red wine or a child’s new pair of trainers can leave marks that a standard mop simply won’t touch. When you’re faced with these “rescue” situations, the way you react determines whether your floor stays pristine or ends up with a permanent blemish. Knowing how to clean vinyl flooring during these mini-crises is about being precise rather than aggressive.
The first rule of rescue cleaning is to always test your method. Find a hidden corner, perhaps under where a kitchen appliance sits, or use a leftover offcut from your installation. Never apply a new cleaning agent to the middle of the room without knowing how the wear layer will react. You should also be wary of “miracle” or melamine sponges. While they seem like a quick fix, they are actually high-grit abrasives. Using them is essentially like sanding down the factory finish of your floor, which leaves a permanent dull patch that will trap dirt even faster in the future.
For emergency spills like ink, juice, or wine, speed is your best friend. While vinyl is water-resistant, it is not a sealed tank. If a liquid sits on the surface for too long, it can seep into the seams or tint the protective layer. Blot the spill immediately with a clean, white paper towel. Avoid rubbing, as this can push the pigment deeper into the textured grain of LVT planks.
The WD-40 Trick for Rubber Scuffs
Rubber-soled shoes are the most common source of frustration for new floor owners. These dark streaks aren’t actually scratches; they are deposits of rubber left on top of the wear layer. If a dry microfibre cloth doesn’t lift them, apply a very small amount of WD-40 to a soft rag and rub the scuff gently. It should disappear almost instantly. However, you must follow this up by washing the area with warm, soapy water. WD-40 is an oil-based lubricant that creates a serious slip hazard if left behind. It also attracts dust, which will turn that spot into a grimy mess within days if the residue isn’t removed.
Baking Soda Paste for Food Stains
If a food stain like tomato sauce or beetroot has started to set, reach for the baking soda. Mix a small amount with water to create a thick, toothpaste-like consistency. Apply the paste to the stain and rub gently with a soft cloth. Baking soda is a mild alkaline, making it perfect for breaking down acidic food pigments without the harshness of bleach. Once the stain is gone, rinse the area thoroughly with clean water to ensure no gritty residue remains. This simple, non-toxic approach is often more effective than expensive “stain-remover” chemicals that can actually damage your floor’s warranty.
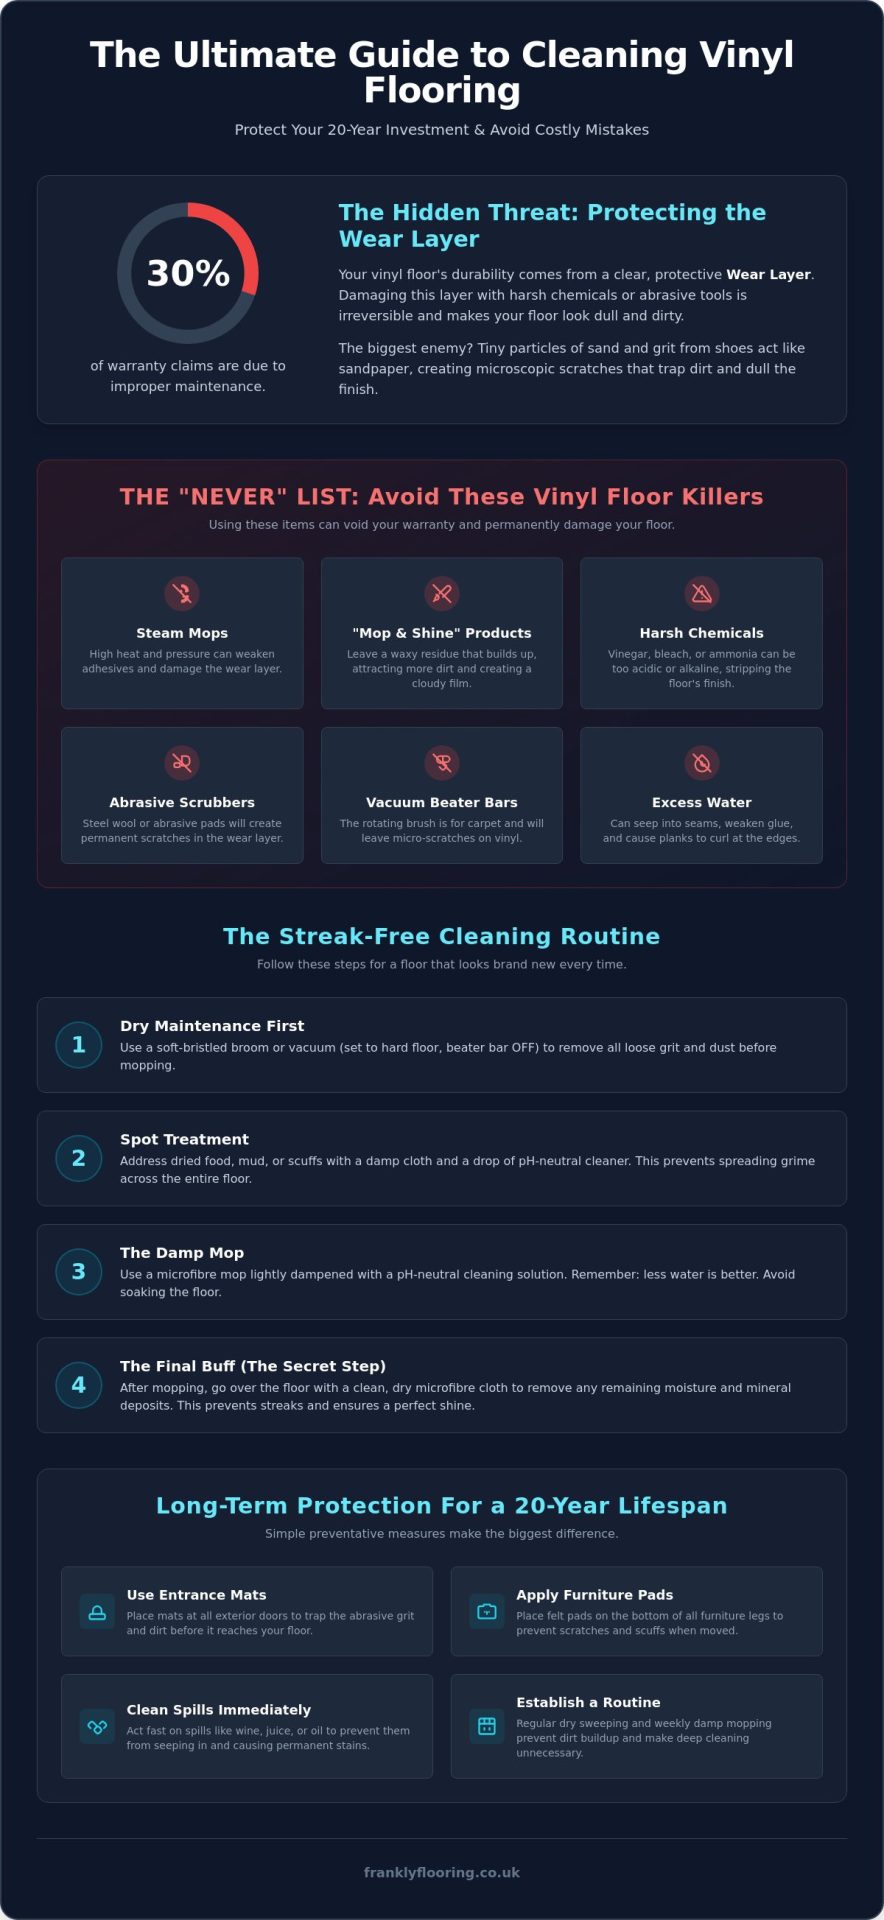
The “Never” List: Things That Will Kill Your Vinyl Floor
If you search online for how to clean vinyl flooring, you’ll find plenty of well-meaning advice that can actually destroy your investment. We see it all the time. A homeowner tries to do the right thing, uses a heavy-duty tool, and ends up with warped planks or a ruined finish. When it comes to long-term care, protecting your floor is often more about what you avoid than what you apply. Using the wrong equipment can turn a 20-year floor into a five-year headache.
Why Heat is Vinyl’s Greatest Enemy
Vinyl is essentially a thermoplastic material. This means it is designed to be resilient, but it also reacts significantly to temperature. You should never use a steam mop on your vinyl or LVT. The intense heat causes the material to expand and soften. Even worse, the pressure forces moisture into the seams where it attacks the adhesive bond underneath. This leads to “peaking” or “doming”, where the edges of the planks lift and create an uneven surface. Most manufacturer warranties are explicitly voided by the use of steam mops for this exact reason.
The Danger of “Wax” and “Polishes”
Avoid any product labeled “Mop and Shine” or those containing wax and ammonia. Modern vinyl and LVT flooring comes with a high-performance factory finish already applied. It does not need to be waxed like the old linoleum floors of the past. Adding wax or polish creates a sticky, artificial layer on top of your wear layer. This build-up traps dust and pet hair, making the floor look duller over time. If your floor looks cloudy, it is usually due to a build-up of dried soap residue rather than a lack of wax.
Finally, keep steel wool and highly abrasive scrubbing pads away from your room. These leave permanent micro-scratches that ruin the floor’s ability to reflect light. Bleach is another chemical to strike from your list. It is far too harsh for the clear protective coating and will eventually cause permanent discoloration or yellowing. If you’ve already made some of these mistakes and the damage is done, it might be time to look at our replacement LVT and vinyl options that come with modern, durable finishes.
Long-Term Protection: Preventing Damage Before It Happens
Once you’ve mastered how to clean vinyl flooring, your next priority is making sure you have to do it as infrequently as possible. Prevention is significantly easier, and far cheaper, than trying to repair a deep scratch or a chemical stain. We want your floor to last the full 20 years it’s capable of, but that requires a bit of proactive thinking. If you treat your floor with respect from day one, the deep clean becomes a rare event rather than a weekly chore.
The most effective tool in your arsenal isn’t a mop; it’s a high-quality walk-off mat at every entrance. These mats catch the grit and moisture before they ever reach your vinyl. As we mentioned earlier, that grit acts like sandpaper underfoot. By stopping it at the door, you’re physically preventing the micro-scratches that eventually make a floor look dull. You should also keep an eye on your pets. Keeping claws trimmed prevents those tiny “ticking” scratches that can eventually penetrate the wear layer if left unchecked.
Furniture is the other major culprit for damage. You must use felt pads on all furniture legs. Avoid rubber or latex protectors at all costs. These materials often contain antioxidants that can cause permanent yellow or brown discolouration on vinyl through a chemical process. Once that stain is bonded to the floor, no amount of scrubbing will remove it. It’s a simple switch that saves your floor from avoidable, permanent marks.
The Furniture Pad Protocol
Don’t just fit felt pads and forget them. You should check them every six months. Over time, they trap the very grit you’re trying to avoid, essentially becoming a block of sandpaper attached to your chair legs. For heavy items like wardrobes or sofas, use wide-load floor protectors to spread the weight and prevent permanent indentations in the planks. If you need to move furniture, never drag it across the room. Always lift the item or use plywood sheets as a bridge to protect the surface while you slide the piece into place.
When to Call it: Is Your Floor Beyond Cleaning?
There comes a point where even the best cleaning routine can’t save a floor. Deep gouges that reach the core material or a wear layer that has completely worn through are permanent issues. If the protective coating is gone, the floor will absorb stains instantly and nothing will bring back the shine. If you’re seeing widespread “peaking” at the seams or the surface is looking tired despite your best efforts, it might be time to browse our laminate flooring or LVT ranges for a fresh start. Sometimes, the most honest advice we can give is that a new floor is a better investment than a cupboard full of expensive rescue chemicals.
Keeping Your Floors in Showroom Condition
Maintaining a beautiful home shouldn’t be a constant battle against grime and scuff marks. By focusing on the essentials of how to clean vinyl flooring, such as protecting that vital wear layer and ditching the steam mop, you ensure your floor remains a foundational element of your home’s character. The best results come from using minimal water and avoiding the high-heat tools that compromise your warranty. It’s about working smarter, not harder.
As a family-run UK business with over 20 years of flooring expertise, we’ve seen how the right care can make a floor last decades. We pride ourselves on being straight-talking experts who value your long-term satisfaction. Whether you’re starting a new project or replacing an old surface, we offer direct-to-your-door UK delivery to make the process as stress-free as possible.
Browse our durable LVT and Vinyl ranges today and find a floor that’s built for the long haul. With the right routine in place, you can enjoy a lasting shine without the unnecessary stress.
Frequently Asked Questions
Can I use a steam mop on vinyl flooring?
No, you should never use a steam mop on vinyl or LVT. The intense heat can cause the thermoplastic material to warp or “dome,” while the moisture under pressure often penetrates the seams and melts the adhesive bond. Most manufacturers will explicitly void your warranty if they find evidence of steam cleaning. Stick to a damp microfibre mop and a pH-neutral cleaner to keep the surface safe.
How do I get rid of the cloudy film on my vinyl floor?
A cloudy film is almost always caused by dried soap residue or “mop and shine” products. To fix this, mop the floor with a solution of one cup of white vinegar per gallon of warm water. The mild acidity breaks down the alkaline soap film without damaging the wear layer. Always buff the floor dry with a clean microfibre cloth afterward to prevent new streaks from forming.
Is vinegar safe for cleaning LVT and vinyl?
Apple cider vinegar or white vinegar is safe and effective when diluted correctly. It provides enough acidity to cut through grease and grime without leaving a sticky film behind. It’s an excellent choice for those looking for an honest alternative to expensive chemical cleaners. Just ensure you don’t use it full strength; the goal is to clean the wear layer, not strip it away.
Can I use a vacuum cleaner on vinyl floors?
You can certainly use a vacuum, but you must turn off the beater bar or brush roll. Rotating brushes are designed for carpet and can leave permanent micro-scratches on a vinyl surface. Use the “hard floor” setting or a dedicated floor attachment. This is the most effective way to remove the abrasive grit that acts like sandpaper on your floor’s finish over time.
How do I remove permanent marker or ink from vinyl?
Permanent marker or ink can usually be removed with a small amount of rubbing alcohol on a clean white cloth. Dab the stain gently rather than scrubbing to avoid spreading the pigment across the grain. If you don’t have alcohol, a high-alcohol hairspray often works too. Always rinse the area with clear water afterward to remove any chemical residue that might dull the finish.
What is the best way to clean textured vinyl that traps dirt?
Textured LVT requires a bit more attention to lift dirt from the deep grain. Use a soft-bristled nylon brush or a high-quality microfibre mop that can reach into the crevices. The two-bucket method is essential here to ensure you aren’t just pushing dirty water back into the texture. Moving the mop in the direction of the grain helps dislodge trapped particles effectively.
How often should I deep clean my vinyl flooring?
We recommend daily sweeping or vacuuming to remove grit, followed by a damp mop once a week. A “deep clean” with a pH-neutral solution is only necessary when you notice a visible build-up of grime or every few months in high-traffic areas. For those who want their floors maintained to a professional standard, The Rutland Cleaning Company provides expert care and shares fascinating details on the history of UK carpet manufacturing. Learning how to clean vinyl flooring properly often means realizing that over-cleaning with harsh chemicals actually does more harm than good.
Will bleach damage my vinyl floor if I use it for disinfecting?
Bleach is far too harsh for vinyl and will eventually cause permanent discolouration or yellowing of the wear layer. If you need to disinfect, use a highly diluted solution of rubbing alcohol or a manufacturer-approved pH-neutral disinfectant. This protects the integrity of the finish while keeping your home hygienic. Protecting your floor’s finish is the best way to ensure it remains easy to clean for years.